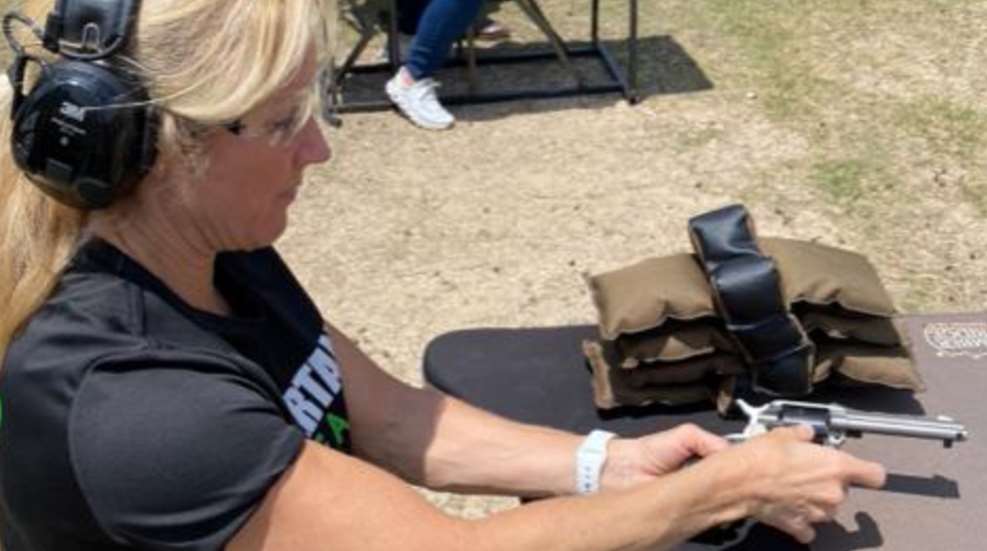
Maybe it is the age we live in, or maybe I am just showing my age. I am amazed how many of my students have never shot a single-action revolver.
Revolvers are handguns with a revolving cylinder. The cylinder of a revolver contains cartridges, not unlike the magazine in a pistol. The cylinder of a single-action revolver can also be removed from the handgun for cleaning and reloading, though not as simple as removing the magazine from a pistol. Revolvers also have chambers, just as pistols do. The difference is a pistol has one chamber, and the revolver has a separate chamber for each cartridge it holds. In other words, the cylinder of a revolver serves as a magazine with each cylindrical opening serving as separate chambers.
Single-action revolvers are different from double-action revolvers in how the firing sequence is initiated. With single-action revolvers, the trigger performs one function. It releases the hammer after being manually cocked to strike the primer of a cartridge to start the firing sequence. With double-action revolvers, the trigger can performs multiple functions. When the trigger is pressed to the rear, the cylinder rotates as the hammer is cocked and reaches the breaking point where the trigger falls forward, striking the primer of a cartridge to start the firing sequence. The hammer of most double-action revolvers can also be cocked into single-action mode, before pressing the trigger to the rear.
Single-action revolvers have a storied past of which many young shooters are unaware. Samuel Colt introduced the first functional revolver in 1836. That is the year Texas won its independence from Mexico. Unfortunately, the development occurred after the Battle of the Alamo. Just sayin’! The first revolvers Samuel Colt made were called the Colt Paterson (they were made in Paterson, N.J.). These guns were offered in multiple calibers and sizes, and were blackpowder, cap-and-ball revolvers that had a cylinder capacity of six shots.
There were predecessors to Samuel Colt’s revolver. In 1718, James Puckle patented a cylinder rotating gun that was similar to the Gatling gun, with the exception that the Gatling gun had rotating barrels instead of a cylinder. The James Puckle patented gun was not a hand-held firearm but a large primitive machine gun. In 1818, Elisha Collier patented a rotating cylinder flintlock handgun that was plagued with problems and not considered reliable. The of course there were Pepperboxes, but all their barrels rotates, not just the cylinder.
During and then after the Civil War, there was a demand for the development of ammunition that would replace cap and ball. Although American companies had been producing metallic cartridges since 1852 (S&W’s Model in .22 Rimfire), it was in 1870, that Smith & Wesson introduced its Model 3, .44-caliber handgun. The cartridge single-action revolver as we know it was born. This prompted Colt to follow suit.
But the development of the Smith & Wesson Model 3 was not the end of the story. There were millions of Colt and Remington cap-and-ball revolvers in personal and military use around the world, and to refit the population would be cost prohibitive. To modernize the existing revolvers in use, Colt and Remington offered conversion kits that converted cap-and-ball revolvers to self-contained metallic cartridge guns. At the time, a new Smith & Wesson or Colt firearm cost approximately $15 but the conversion kit costs less than $4. It was more economical to convert the old cap and ball firearms into guns that fired the newer self-contained cartridges, than it was to buy new guns.
The converted revolvers still looked like the original cap-and-ball design at first glance—and they were made new by Colt. It was the Smith & Wesson Model 3 and the 1873 Colt that first came out with the classic single-action revolver design as we think of it today. Even though there were many attempts to develop a double-action revolvers, they weren’t initially successful in America. That classic look dominated the revolver world until about 1889. This is when Colt introduced the first reliable, American-made, double-action revolver called the Colt Model 1889.
Single-action revolvers are still in use today and are still very popular with firearm enthusiasts. Colt, Ruger, Uberti, Pietta and many other gun manufacturers still produce and offer new models of these “Old West” firearms. There are also Cowboy Action competitions, where competitors use the classic single-action design in their events.
Many firearms trainers are starting to use single-action revolvers in their training. These firearms are proving to be invaluable in teaching new and old shooters alike, the proper knowledge, skills and attitudes in properly and safely using a handgun.
Shooting a single-action revolver takes considerably more muscle memory than modern striker-fired semi-automatic pistols. There are many more steps to follow from the time you load one to the time you fire it. There are approximately 10 steps to load and fire a single-action revolver and about six steps to unload it.
Correct Firing Procedure
—Open the loading gate.
—Insert a cartridge through the access in the side of the frame into the cylinder.
—Manually rotate the cylinder to the next empty chamber in the cylinder. Most models require you to hold the hammer in a half-cocked position to manually rotate the cylinder.
—Repeat Step 3 until all the chambers are loaded.
—Close the loading gate.
—Properly grip the revolver, keeping it pointed downrange and in a safe direction, and raise the firearm to eye level.
—Manually cock the hammer of the firearm with the thumb of the strong hand.
—Obtain the proper sight alignment and sight picture, and work on breath control and hold control.
—Press the trigger with the index finger of the strong hand until the hammer drops, firing the firearm.
—Maintain correct follow-through.
—Repeat Steps 7 to 10 to fire the remaining rounds of ammunition.
Correct Unloading Procedure
—Open the loading gate.
—Slightly tilt the muzzle upward, while maintaining a safe direction and muzzle control.
—Line up the chamber of the cylinder with the extractor rod and the opening of the loading gate in the side of the frame of the revolver.
—Manually push the extractor rod or “plunger” with the index finger of the reaction hand, toward the rear, pushing the rod through the cylinder, into the fired or the unfired cartridge until it falls clear of the firearm; Most models require you to hold the hammer in a half-cocked position to manually rotate the cylinder.
—Repeat Steps 3 and 4 until all the fired or unfired rounds are removed from the firearm.
—Leave the loading gate open, lay the revolver on the table with the loading gate facing up to display a safe firearm.
