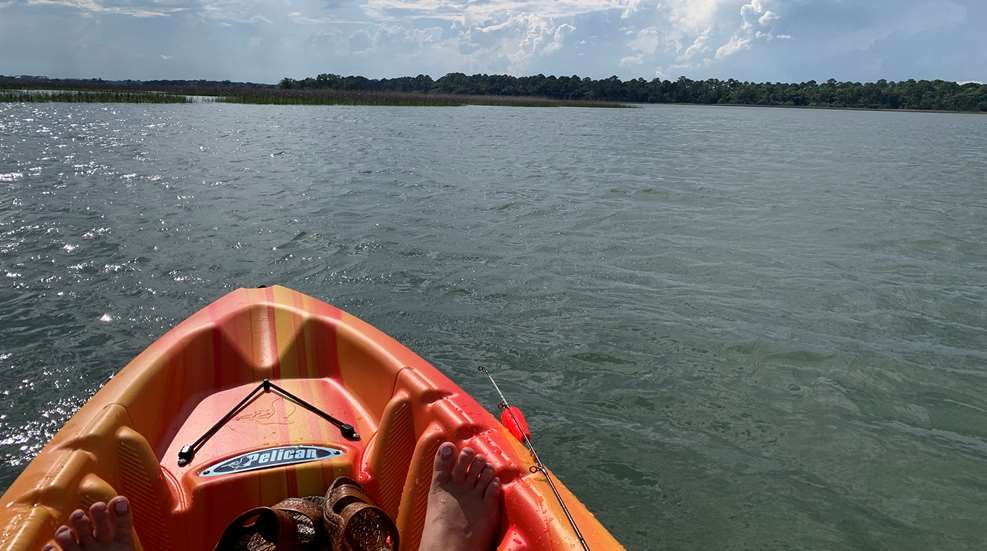
The sun on my face, a brackish breeze in my hair, and marsh for miles is my ideal afternoon. Add some tunes and a rod and I’m not sure I’ll ever dock. I’m spending the summer in Charleston, South Carolina, home to beautiful marshes, water sports and redfish. Join me on my journey to summer bliss with a few tips and tricks I’ve learned so far about kayak fishing.
The Kayak
There are two general categories of kayaks: sit-in or sit-on. I purchased a basic sit-on model primarily so that I don’t find any unwelcome critters hiding inside (since I’ll be storing it outdoors) and to maximize my sun exposure. The brackish marshes through which I will be floating—a confluence of fresh and salt water as major rivers flow into the sea—offer a wild transitional geography. But even the smallest amount of salt can cause corrosion on the metal parts of my fishing rod or kayak, so it’s important that I later rinse them off with fresh water.

Safety First
State kayaking laws differ by state, so be sure to check into the specific requirement of yours. For example, in South Carolina kayakers must have a readily accessible and properly sized lifejacket on board, as well as a sound-producing device. My setup is made up of a whistle attached to my purple lifejacket, which has served me well over the years. At the time I bought this lifejacket, it was the only Coast Guard approved slip-on life jacket on the market. I find slip-ons much more comfortable, and am happy to report there are now plenty more options from which to choose.
The Paddle
The staff in the sporting goods offered advice on how to determine proper paddle length: Stand it in front of you and try to curl your fingers over the top of the blade. If your fingers barely reach, or your entire hand can flop over, you’ll need to keep looking. At 5’7”, the 210 cm. paddle worked for my height, so I took it home. However, I soon discovered that the width of the kayak is an equally important factor in selecting a paddle. I ended up exchanging mine for a 220 cm. If you are purchasing yours in a store, you can avoid this by holding the paddle over the width of the kayak and make sure the blades stick out enough on each side to allow you to paddle properly.
Loading and Unloading
I sometimes kayak alone, so I have to be able to car-top my kayak by myself. I purposely bought a lightweight kayak (43 lbs.), but strategy is more important than strength when loading and unloading the boat. Here’s how I easily load my kayak on top of my Kia Soul. I take the strap used to secure the kayak and loop it vertically around my roof rack. I tighten it until it is taught, then place a towel over it. This protects my car as I slide the kayak up and onto the roof. If I’m in grass, it’s easy to hoist the bow of the boat onto the top of the car, letting the stern drag through the grass until the boat is leaning against the strap/towel contraption. I then push from the stern, and walk the end to the back of the car until the boat is straight. I also flip the kayak so that it is inverted. This protects the bottom from being pushed into the roof rack, possibly warping under the pressure of the straps.
If you don’t have grass, as you might not at paved boat ramps, you can also use your lifejacket. I place my lifejacket on the ground next to my car. Then, I walk the kayak over using the grip on the side. I lower the stern onto the lifejacket and lift the bow onto my strap/towel contraption. The life jacket protects the tip of the kayak from the damaging pavement, and the process is then the same. To unload, I reverse the process.
The Fishing Setup
While I’ve had some kayaking experience, my fishing experience consists of catching bluegill with bits of hot dog on a Scooby-Doo rod at age 8. For anyone else with limited fishing experience, I highly recommend visiting your local tackle shop. It is a valuable resource and the staff is usually happy to help! While I could have gotten everything I needed at a big box store, I’m happy I went to Haddrell’s first. They set me up with everything I needed and some local tips.
The main requirements consist of a rod, main fishing line, lead line, a bobber and hooks. Different regions, bodies of water and the fish will dictate your specific setup (again—go to your local tackle shop). The bobber was the first thing the salesman selected for me. He told me it would be easy to see, and its popping sound underwater sounds like shrimp, which is what redfish like to eat. The bobber I bought was already set with swivels and weights—easy, peasy!
The clerk suggested very wide hooks, great if you are a beginner, as the pointed end won’t stab you every time you need to add bait or unhook a fish. Always purchase your main line and fishing rod together, because the weight limit on your line should always be lower than your rod’s weight limit. This way, the line will snap before your rod does if you catch something too heavy or snag somewhere. The lead line is what you’ll attach your hook and bobber to. It’s clear so the fish won’t see it.
The Supplies
Pliers and scissors are necessary if you’re going out fishing. A multi-tool works as well. I went ahead and replaced the scissors with a pocket knife in my kit. Time will tell if I will regret this swap, but a knife seems like a more versatile tool. I’m also packing an extra package of inexpensive rope, just in case I need to tie off the kayak somewhere, or another situation emerges. Old sailing habits die hard; you can never have too much line handy.
Bait! I bought some white, soft plastic shrimp just in case I’m too lazy to go to the store or want to try something else out on the water. I was advised to just pick up some frozen shrimp at the grocery store, which is what I plan to do. It’s easy, and the fish like it. Avid fishermen might give you some grief about this, but so what? Common complaints are, “They don’t move like live shrimp,” and “You’ll only catch bait fish,” but I trust my local knowledge more!
All I need next is my floating waterproof speaker, water bottle, sunscreen, bandana and snacks! Personally, I think candy is the ideal kayak snack. When you’re covered in salt, a quick burst of sweet energy gives you that summer camp feeling. I also highly recommend a bandana when kayaking. It’ll keep the sun off your neck, serves as a buff if the wind picks up and is a handy towel if you need to dry your hands.
Finally, keep the wind, tides and weather in mind every time you go out, so that you always have a safe and fun experience. Most importantly, don’t let anyone tell you that you aren’t “fisherwoman” enough to get out on the water. Kayak fishing is for everyone!


